Introduction
If you are building a production-level app, you have almost certainly hit this wall: you set up a standard bottom navigation bar flutter implementation, everything looks great, and then you tap an item to go to a detail screen. BAM. The new screen slides in and completely covers your bottom navigation bar.
Your user is now trapped on that detail screen without a quick way to switch tabs. They have to hit the back button repeatedly just to get back to the main navigation. It is frustrating for the user, and as a developer, it is incredibly confusing to fix the first time you encounter it.
I have been building Flutter apps for over five years, and I still remember wrestling with this exact issue early in my career. You are not alone—this is one of the most common routing hurdles developers face when scaling an app. In the early days, we had to write complex, manual nested navigators using CupertinoTabScaffold or custom IndexedStack implementations just to keep that bar on the screen.
This article is for developers who are stuck with a disappearing navigation bar and want the modern, robust solution. We are going to solve this using the standard tools available in the latest 2026 Flutter stable releases, ensuring your flutter bottom nav 2026 implementation acts exactly like top-tier apps such as Instagram or Spotify.
What the Problem Is
When developers first implement a flutter navigation bar, they usually use a Scaffold with a bottomNavigationBar property, and a simple setState to switch out the body widget based on the selected index.
The problem reveals itself the moment you call Navigator.push() or context.go(). By default, Flutter’s routing system pushes the new screen onto the Root Navigator. The Root Navigator sits at the very top of your app’s widget tree, meaning anything pushed onto it will cover the entire screen—including the Scaffold that holds your bottom navigation bar.
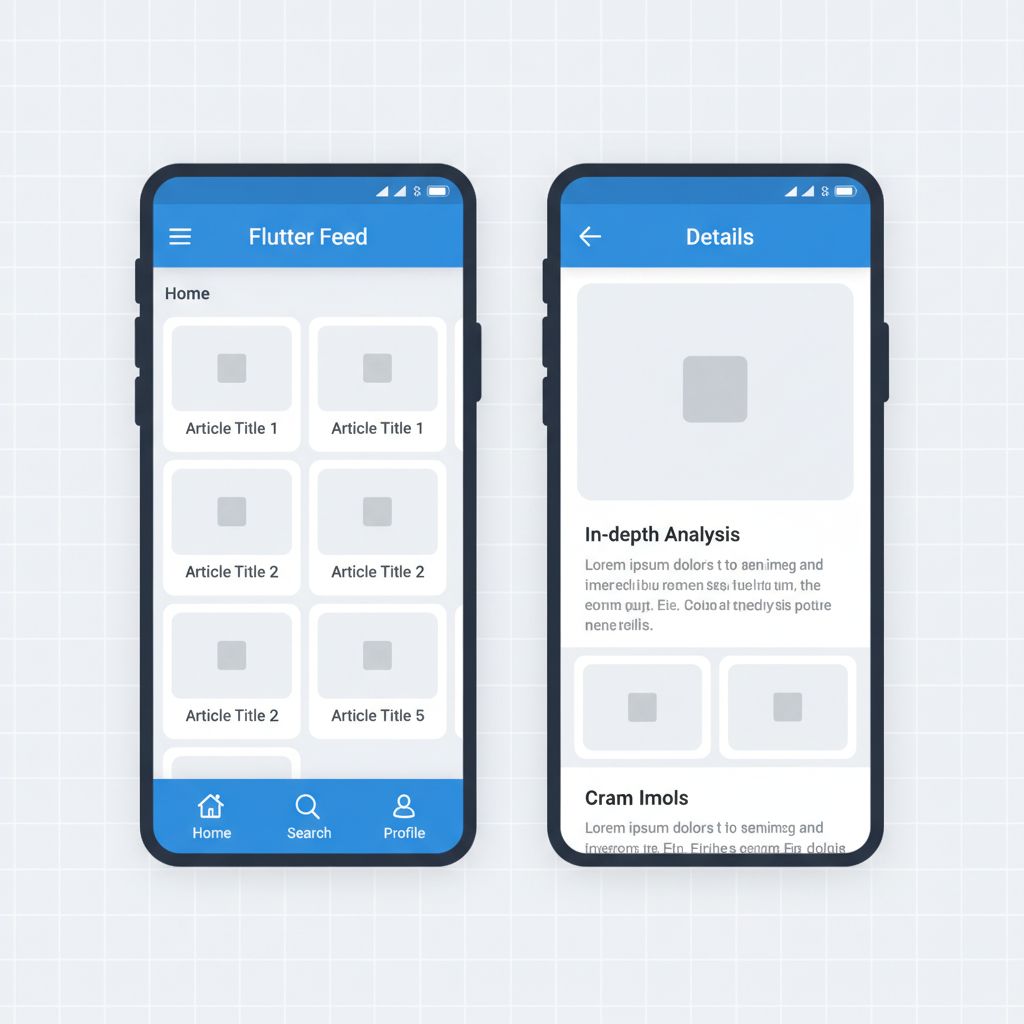
You don’t want the new screen to replace the whole app. You want the new screen to be pushed inside the current tab, leaving the bottom bar exactly where it is.
Why This Happens (Real Explanation)
To understand the fix, you need to understand how Flutter thinks about routing. Flutter uses a stack-based navigation system. Think of it like a stack of playing cards.
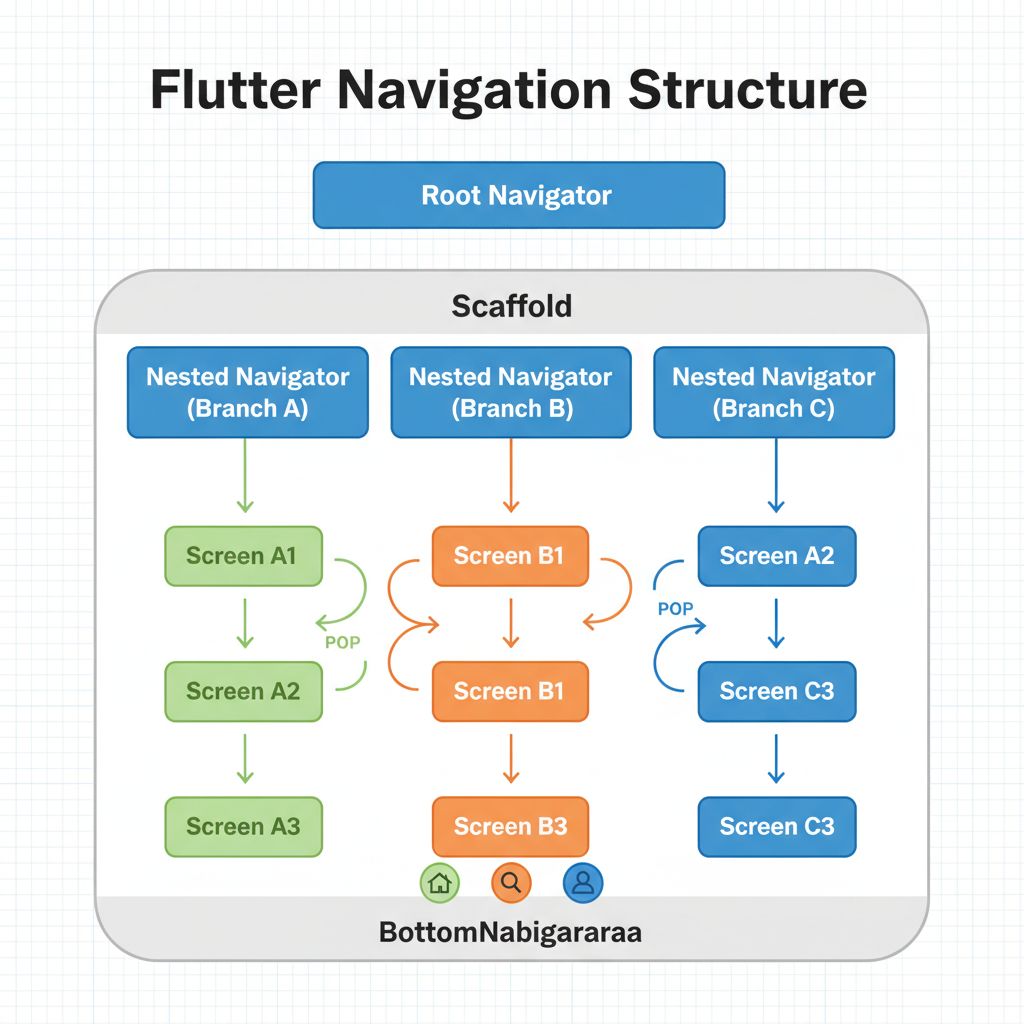
When your app starts, the MaterialApp creates a Root Navigator. Your main Scaffold (the one with the bottom nav) is the first card in that stack. When you push a new route, you are placing a new card on top of the entire deck. The new card doesn’t care what was underneath it; it just covers everything.
To achieve persistent bottom navigation, we need Nested Navigators. Instead of one single stack of cards, we need a setup where the bottom navigation bar acts as a permanent frame, and each individual tab has its own separate stack of cards. When you navigate inside Tab A, you are only adding cards to Tab A’s stack. The frame (the bottom nav) remains untouched.
When You Usually See This Issue
This issue rarely pops up in simple utility apps or single-page prototypes. You will almost always encounter this in real-world, production-level applications such as:
- E-commerce apps: A user is browsing a “Shop” tab, taps a product, and wants to keep the “Cart” and “Profile” tabs visible at the bottom.
- Social media feeds: Scrolling through a timeline, tapping a user’s profile, and still needing the bottom bar to quickly jump to messages.
- Dashboard applications: Navigating deep into analytics charts while keeping the main navigation anchor available.
Quick Fix Summary (Decision Shortcut)
If you are in a rush and just need the architectural answer, here is how you fix it in 2026:
- Stop using standard
Navigator.push()with a basicsetStatebottom bar. - Use the
go_routerpackage. It is the official, declarative routing solution maintained by the Flutter team. - Implement
StatefulShellRoute. This specific class ingo_routeris designed exactly for this problem. It automatically creates and manages nested navigators for each tab while preserving their state.
Step-by-Step Solution (Core Section)
Let’s build the correct implementation. We will use go_router, which has become the industry standard for declarative routing in Flutter.
Step 1: Define the Router with StatefulShellRoute
Instead of a normal route, we use StatefulShellRoute.indexedStack(). This tells the router: “Hey, I have a shell (the bottom nav bar) that wraps around multiple independent branches (the tabs).”
final rootNavigatorKey = GlobalKey<NavigatorState>();
final shellNavigatorAKey = GlobalKey<NavigatorState>(debugLabel: 'shellA');
final shellNavigatorBKey = GlobalKey<NavigatorState>(debugLabel: 'shellB');

final goRouter = GoRouter(
  initialLocation: '/home',
  navigatorKey: rootNavigatorKey,
  routes:[
    StatefulShellRoute.indexedStack(
      builder: (context, state, navigationShell) {
        // This returns the Scaffold containing the BottomNavigationBar
        return ScaffoldWithNestedNavigation(navigationShell: navigationShell);
      },
      branches:[
        // The first tab (Home)
        StatefulShellBranch(
          navigatorKey: shellNavigatorAKey,
          routes:[
            GoRoute(
              path: '/home',
              pageBuilder: (context, state) => const NoTransitionPage(
                child: HomeScreen(),
              ),
              routes:[
                // A nested route inside the Home tab!
                GoRoute(
                  path: 'details',
                  builder: (context, state) => const DetailScreen(),
                ),
              ],
            ),
          ],
        ),
        // The second tab (Settings)
        StatefulShellBranch(
          navigatorKey: shellNavigatorBKey,
          routes:[
            GoRoute(
              path: '/settings',
              pageBuilder: (context, state) => const NoTransitionPage(
                child: SettingsScreen(),
              ),
            ),
          ],
        ),
      ],
    ),
  ],
);
Why this works: Each StatefulShellBranch gets its own navigatorKey. When you navigate to /home/details, the router knows to push the DetailScreen onto shellNavigatorAKey, NOT the rootNavigatorKey. This keeps the bottom nav bar visible.
Step 2: Build the Scaffold Wrapper
Next, we need the actual UI for the bottom navigation bar. Notice how we use the navigationShell provided by the router to handle index switching and branching.
class ScaffoldWithNestedNavigation extends StatelessWidget {
  const ScaffoldWithNestedNavigation({
    Key? key,
    required this.navigationShell,
  }) : super(key: key);

  final StatefulNavigationShell navigationShell;

  void _goBranch(int index) {
    navigationShell.goBranch(
      index,
      // A common pattern: if the user taps the active tab, pop to the top of its stack
      initialLocation: index == navigationShell.currentIndex,
    );
  }

  @override
  Widget build(BuildContext context) {
    return Scaffold(
      body: navigationShell, // The IndexedStack containing our nested navigators
      bottomNavigationBar: NavigationBar(
        selectedIndex: navigationShell.currentIndex,
        onDestinationSelected: _goBranch,
        destinations: const[
          NavigationDestination(
            icon: Icon(Icons.home),
            label: 'Home',
          ),
          NavigationDestination(
            icon: Icon(Icons.settings),
            label: 'Settings',
          ),
        ],
      ),
    );
  }
}
When to use this: Use this pattern for your primary app architecture. It is scalable, highly performant, and handles deep linking perfectly because every screen has a distinct URL path.

Common Mistakes Developers Make
- Using IndexedStack without Navigators: Many developers try to build this manually by wrapping an
IndexedStackin a Scaffold, but they just put standard widgets inside the stack. This preserves state, but the moment you callNavigator.push(), it still covers the whole screen because there are no nested navigators. - Forgetting
parentNavigatorKey: Sometimes you want a screen to cover the bottom nav (like a full-screen video player or a login modal). If you forget to assign theparentNavigatorKey: rootNavigatorKeyto that specific route, it will awkwardly open inside the tiny tab window. - Over-engineering with custom Overlays: Trying to force a bottom navigation bar using Flutter’s
Overlaysystem is a recipe for disaster. It breaks accessibility, disrupts system back gestures, and makes animations look jagged.
Warnings and Practical Tips
⚠️ Memory Management: Because StatefulShellRoute keeps the state of every tab alive in memory, be careful if your tabs contain heavy resources (like multiple playing videos or massive unpaginated lists). You may need to manually dispose of controllers when tabs are out of focus.
💡 Tap-to-Top Behavior: Notice the initialLocation: index == navigationShell.currentIndex line in our code? That is a pro tip. If a user is deep inside the “Home” tab and they tap the “Home” icon on the bottom bar again, this code pops them all the way back to the root of that tab. This is exactly how iOS and Android native apps behave.
💡 Use NavigationBar instead of BottomNavigationBar: In modern Flutter (Material 3), NavigationBar is the preferred widget over the older BottomNavigationBar. It provides better touch targets, smoother animations, and native Material 3 styling out of the box.
Edge Cases and Limitations
While StatefulShellRoute is incredibly powerful, it has a few limitations. If you have an app with highly dynamic bottom navigation (e.g., the number of tabs changes based on user permissions after they log in), updating the router configuration on the fly can be tricky.
Additionally, if you need custom, complex animations between tab switches (like a 3D cube rotation), the default indexedStack implementation will snap instantly. You would need to implement a custom shell builder to animate the transitions between branches manually.
What Happens If You Ignore This Problem
If you leave the default behavior where pushing a route hides the navigation bar, your app’s user experience will suffer dramatically. Users rely on the bottom navigation bar as their anchor. When it disappears, they feel disoriented.
Worse, if they navigate three or four screens deep into a tab, they have to press the back button three or four times just to check their messages in another tab. In modern mobile UX, forcing users to “back out” of a flow just to switch contexts is a primary cause of app abandonment.
FAQ Section
How do I hide the bottom navigation bar for just one screen?
In your go_router setup, find the GoRoute for the screen you want to be full-screen. Add parentNavigatorKey: rootNavigatorKey to that route. This tells the router to bypass the nested tab navigator and push the screen onto the absolute top of the app.
Can I still use the old Navigator 1.0 for this?
Technically, yes. You can manually create a Navigator widget inside each child of an IndexedStack. However, managing system back buttons, Android back gestures, and deep linking with manual nested Navigator widgets is incredibly error-prone. The declarative routing approach saves hundreds of lines of boilerplate.
Does this work with Cupertino tabs?
Yes! If you are building an iOS-styled app, CupertinoTabScaffold actually handles nested navigators for you automatically. However, if you want a unified codebase that works across Android, iOS, and Web with deep linking, the go_router shell approach is much more scalable.
Final Takeaway & Conclusion
Implementing a persistent bottom navigation bar flutter app doesn’t have to be a headache. The root cause of the disappearing nav bar is simply that Flutter pushes new screens to the highest available navigator. By creating nested navigators, we create safe, isolated sandboxes for each tab to navigate within.
Actionable Checklist:
- Migrate your routing to
go_routerif you haven’t already. - Replace your standard
Scaffoldsetup with aStatefulShellRoute.indexedStack. - Define separate
StatefulShellBranchpaths for each of your tabs. - Pass the
navigationShellto your custom Scaffold to handle index switching. - Test your deep links to ensure they open inside the correct tab.
Take an hour to refactor your navigation code to use this architecture. It might seem like a bit of boilerplate at first, but once it clicks, you will never have to worry about broken navigation states, trapped users, or disappearing bottom bars again. Happy coding!